|
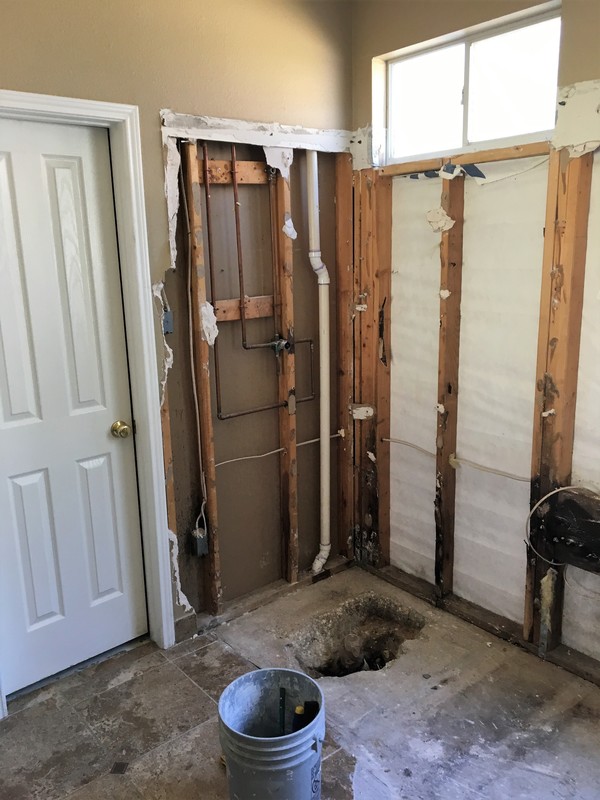
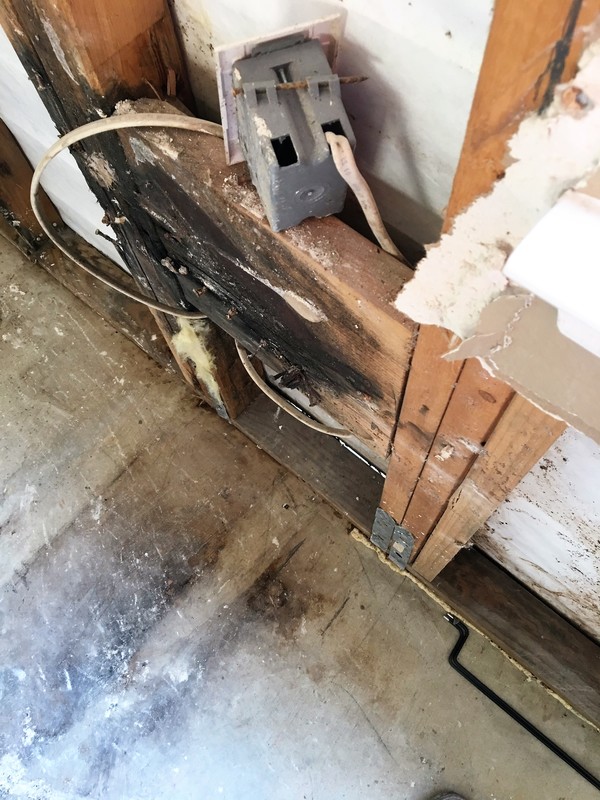
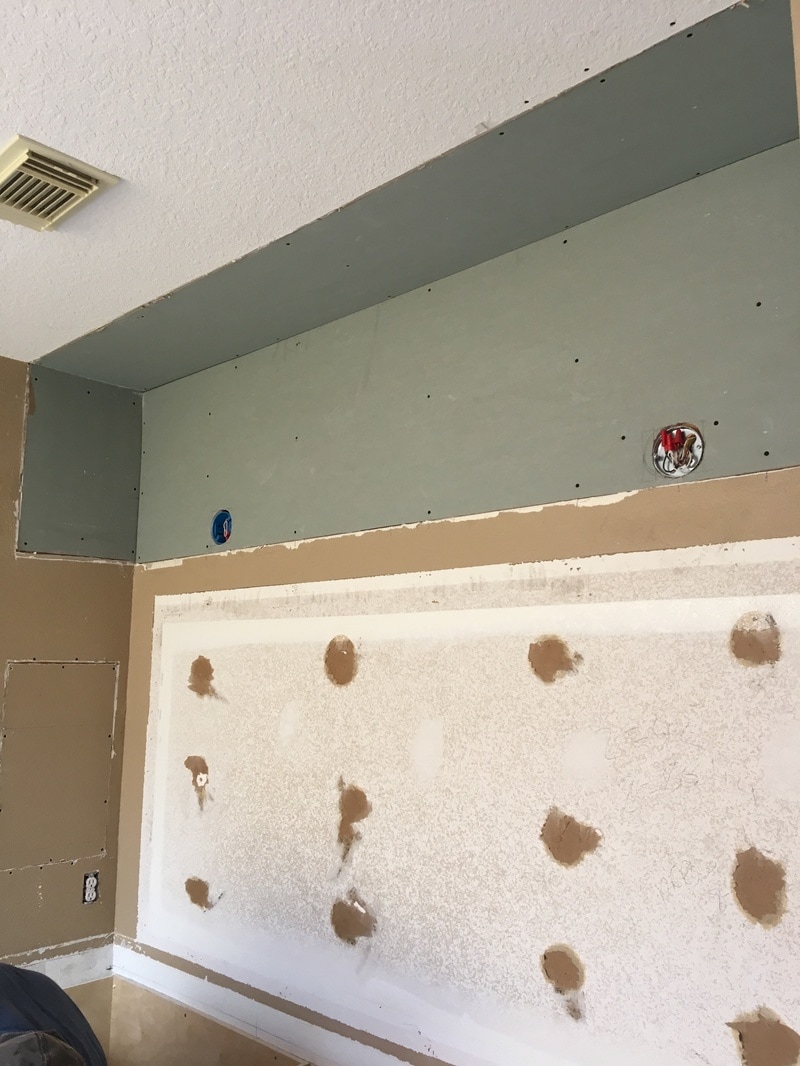
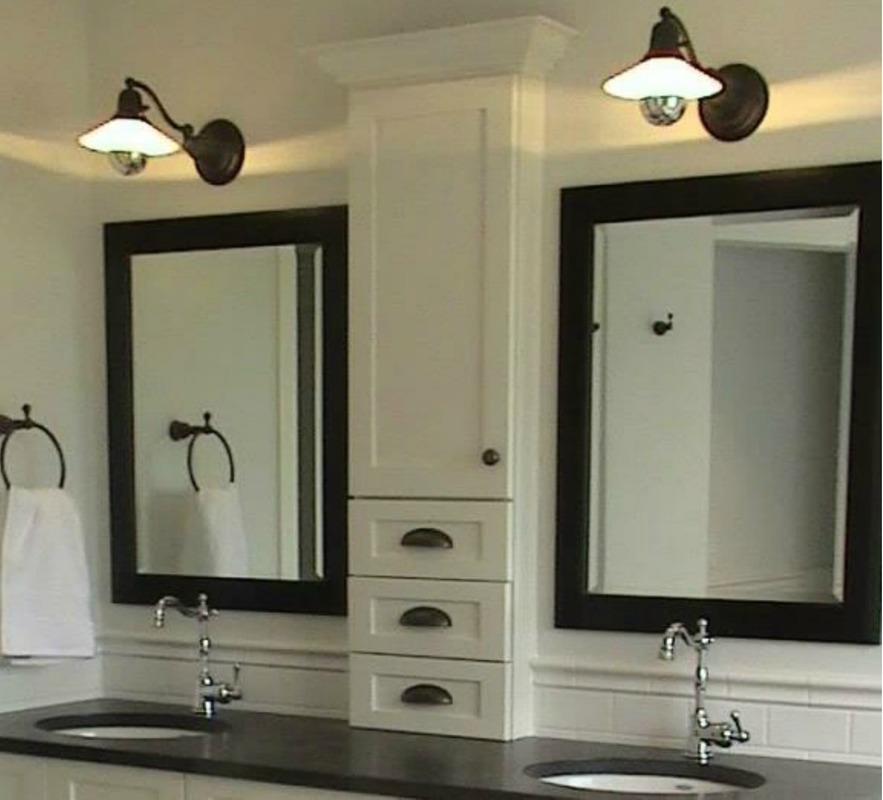
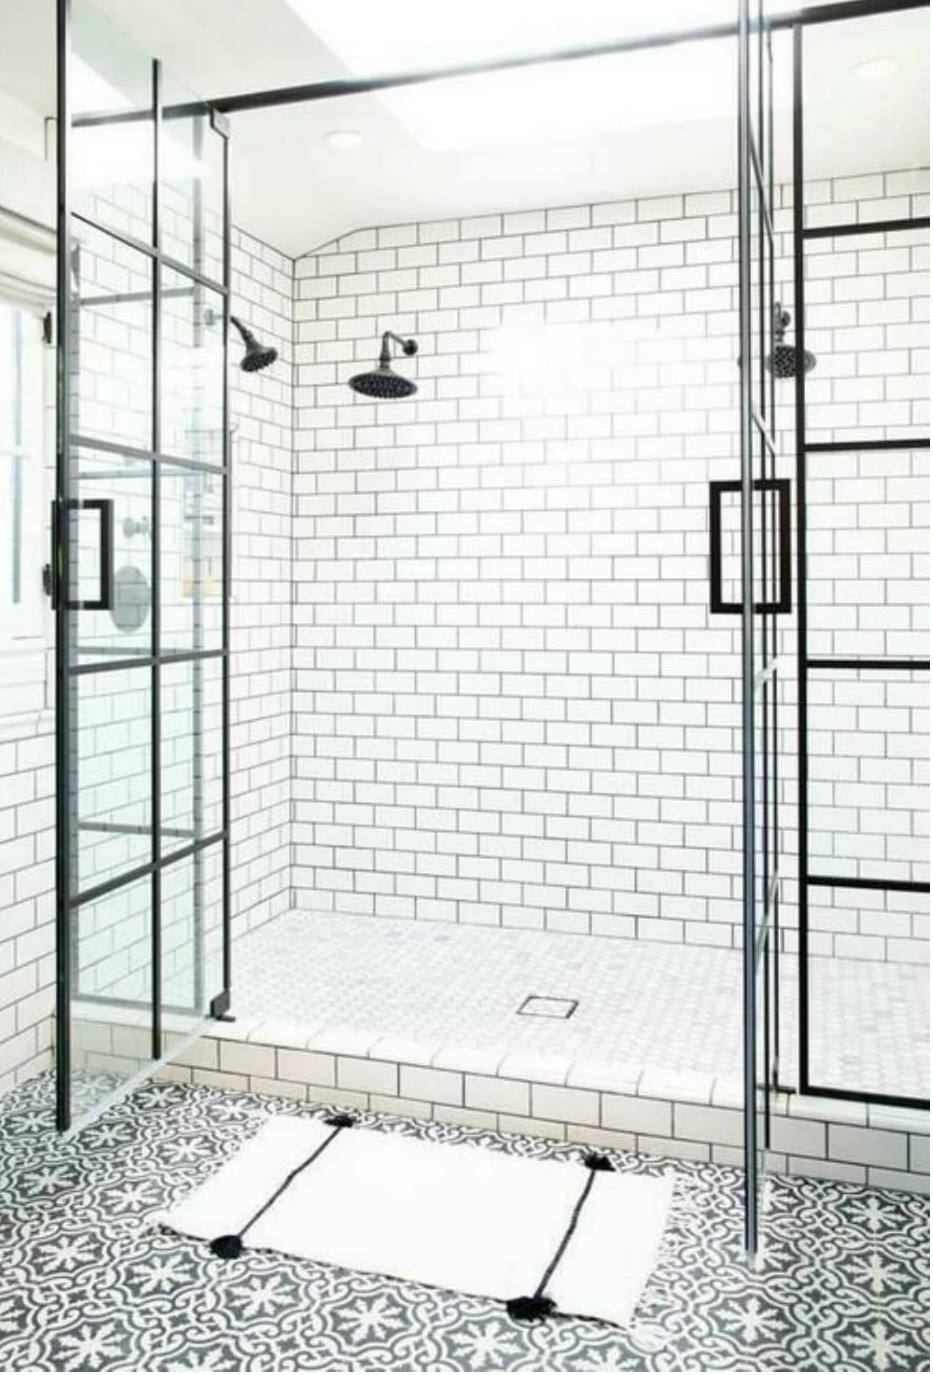
So very excited to share the details (and reveal photos!) from the master bath remodel that is just wrapping up. The homeowners were a pleasure to work with and had the best taste. They knew exactly what they were looking for - when I initially walked the job, they had prepared a PDF document containing three images of the desired shower style, tile, and vanity. Those photos ruled the job and I’m pretty pleased with not only the final outcome but the similarities between the images as well. This is Day One: 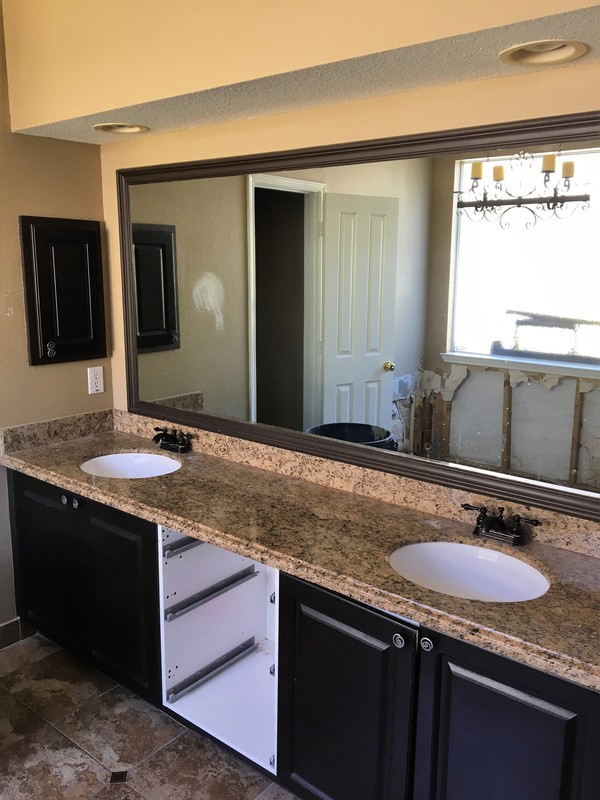 Progress Photos: Almost There!: 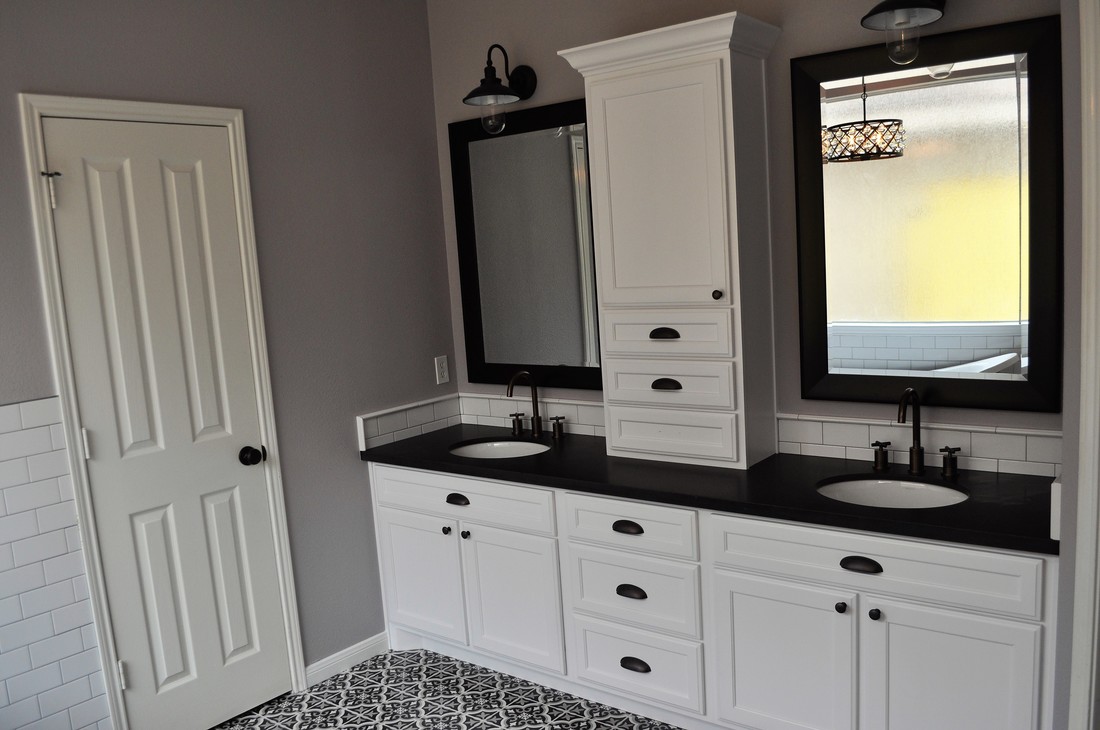 The frameless shower glass enclosure is on order and vanity light bulbs are in my truck (which has a lot to do with the lighting in these photos) so I will post more images once those pieces are installed and the light is a little better. There was substantial demolition required, and the client wanted the bulkhead over the vanity to disappear and provide a clean, seamless look for the “new” wall. All of the tile had to come up, the old vanity and granite came out, and the plumbing had to be reconfigured to allow for the new style and features of the fixtures. The shower was enlarged and we added an LED light fixture as well as a rain shower head coming from the ceiling, a slide bar, body sprayer, four body jets and the frameless glass enclosure. 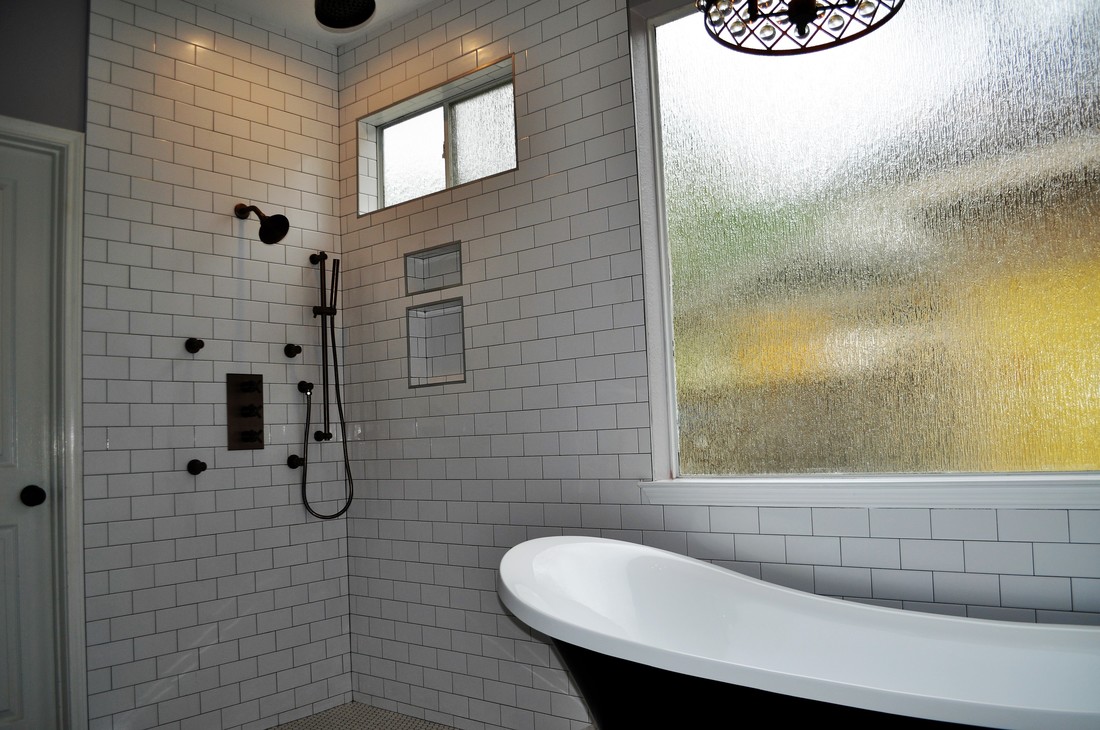 Where the outdated tub was, a freestanding lion foot tub was installed with a wall-mount faucet and body spray wand. A chandelier was installed over the tub where there had not been a light fixture previously. 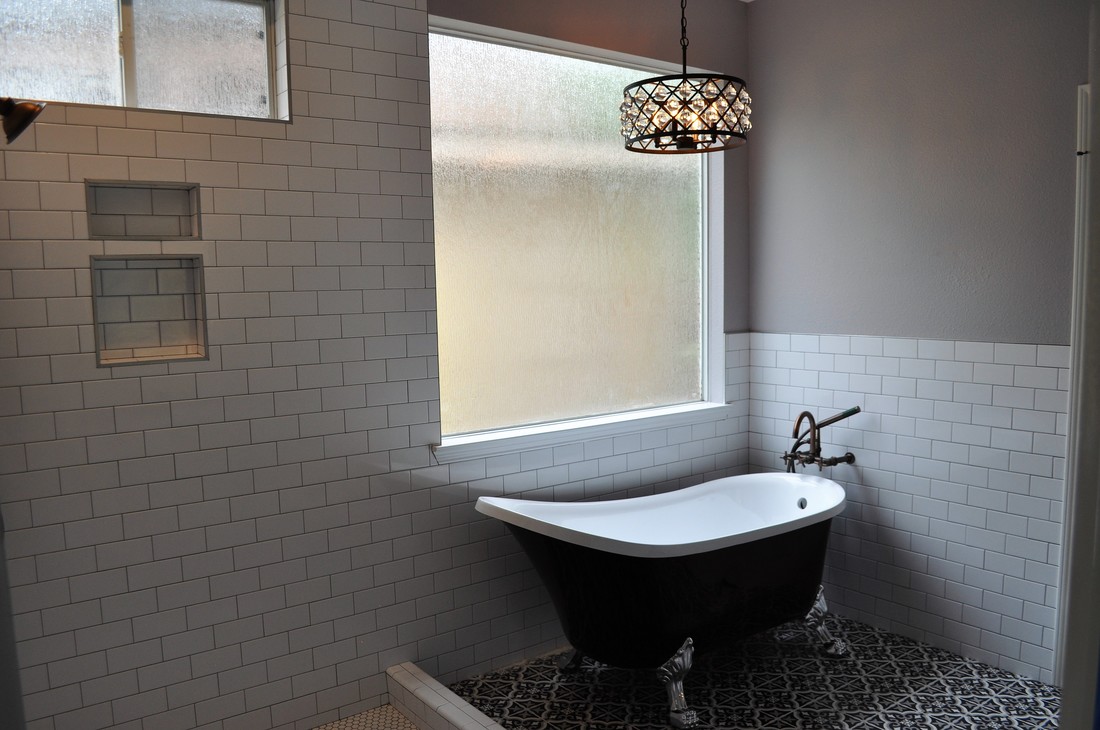 The double vanity with center tower was custom built to the owner’s specifications and replaced the in-wall medicine cabinet that was an eyesore and provided little storage. The vanity color was matched to the subway tile to eliminate a possible contrast between the shades of white. The oil-rubbed bronze hardware is carried through the bath, from the door handles to plumbing fixtures to cabinet hardware. The chrome feet aren’t to the owners liking, and will be replaced with bronze ones as well. The granite was honed on site and a piece was crafted as a saddle to create a threshold between the bathroom and master bedroom. These light fixtures wouldn’t have been possible without the removal of the bulkhead and while it presented a challenge, I’m so glad we were able to obtain the look in the end. 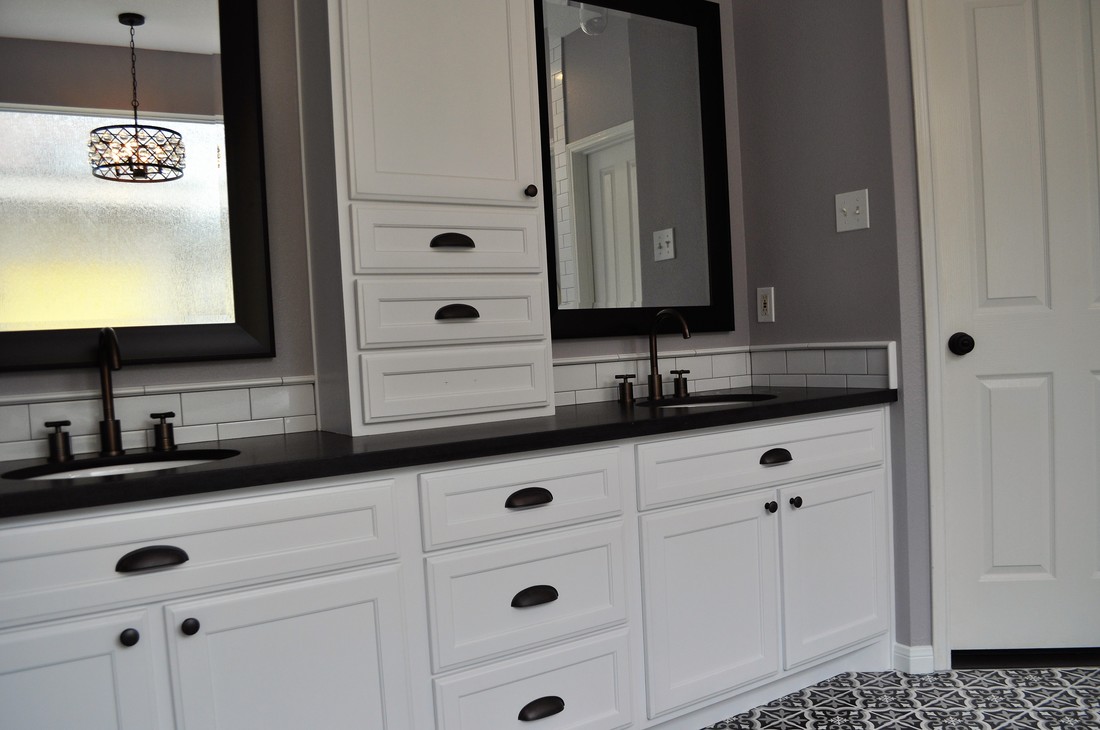 The tile work was significant – subway tile, cement-look floor tiles, a honeycomb mosaic on the shower floor, and bullnose and pencil accent pieces were carefully installed with epoxy grout to inhibit mold growth. The closet was painted and tiled to match the bathroom, giving the entire large space a cohesive feel. The color is Fashionable Gray by Sherwin Williams and shows as a very pretty gray with hints of lilac.  Finally, in my version of "Who Wore It Better" here are the three images I used to guide the project. I would love to hear your thoughts on differences, similarities, or how I sourced material using *only* photos... If you’re contemplating a bathroom remodel and like what you have seen here, please contact us for a consultation! We can complete all aspects of the job and would love to be part of your project. Check back for final images coming soon…
0 Comments
Your comment will be posted after it is approved.
Leave a Reply. |
AuthorJulie Monkhouse Archives
April 2020
Categories |


 RSS Feed
Telephone832.774.3764
|
|